Classic Chicken Caesar Wrap Recipe, Easy American Lunch in 30 Minutes
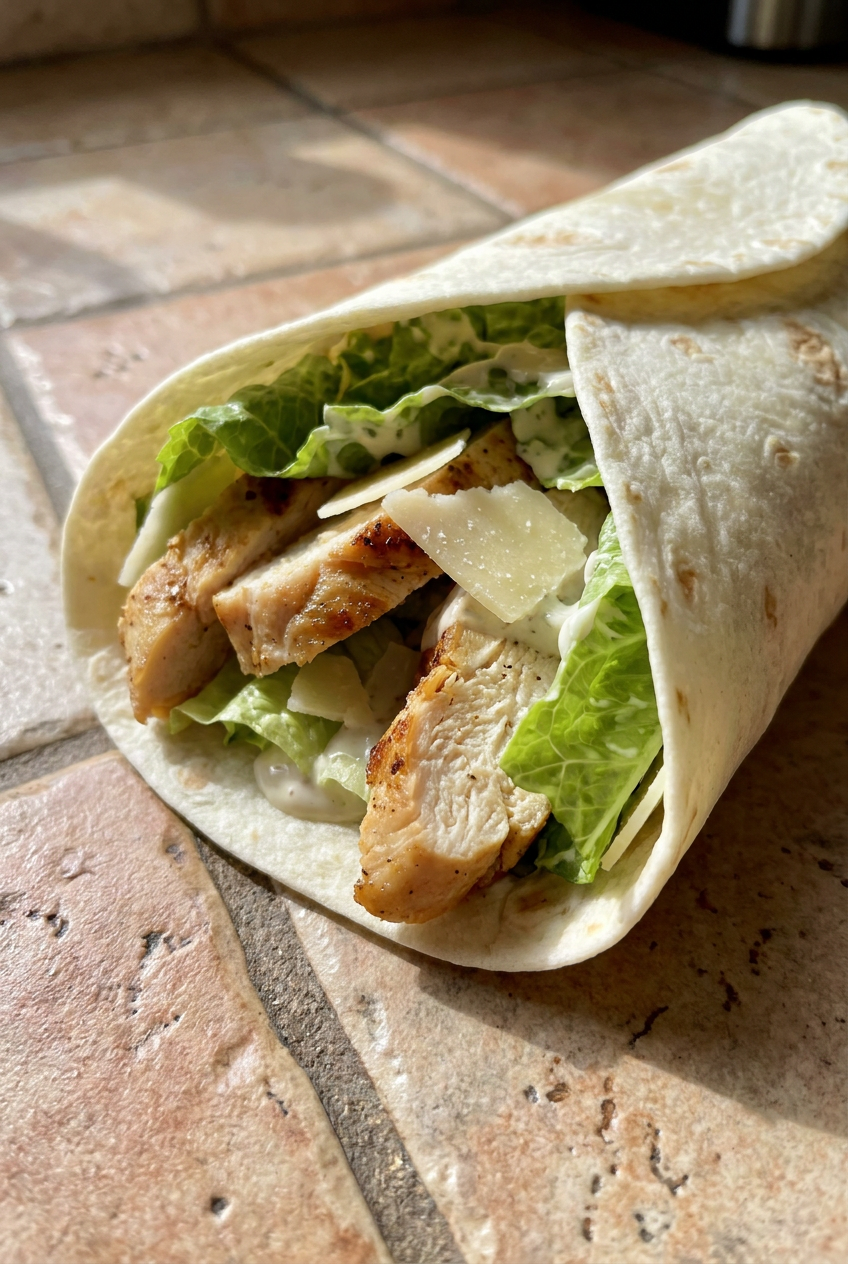
Table of Contents
- Classic Chicken Caesar Wrap: A Handheld Twist on the Timeless Caesar Salad
- Why You Will Love This Classic Chicken Caesar Wrap Recipe
- Your Simple Ingredients for the Perfect Classic Chicken Caesar Wrap
- How to Make Perfect Classic Chicken Caesar Wrap
- Pro Tips and Easy Variations for Your Classic Chicken Caesar Wrap
- Serving Suggestions for a Perfect Lunch
- Nutrition Information
- Storage and Make-Ahead Instructions
- Your Classic Chicken Caesar Wrap Questions Answered
- More Incredible American Recipes to Try
- The Story Behind This Recipe
- Pin This Recipe for Later
Classic Chicken Caesar Wrap: A Handheld Twist on the Timeless Caesar Salad
There is something deeply satisfying about a Caesar salad, the way the cold crunch of romaine meets the salty punch of Parmesan and that creamy, garlicky dressing. It has been my go-to order at restaurants for as long as I can remember. But somewhere along the way, during a particularly busy week when sitting down with a fork felt like a luxury I did not have time for, I started tucking all those beautiful components into a warm flour tortilla. That moment changed everything. This classic chicken caesar wrap recipe was born out of necessity, a need for something quick that did not sacrifice the bold, familiar flavors I craved, and it quickly became a staple in our home. The first time I made it, I remember standing at the kitchen counter, taking that first bite, and realizing this was not just a shortcut, it was an upgrade. The tortilla adds a soft, chewy texture that somehow makes the creamy dressing and crunchy croutons even more enjoyable.
What sets this version apart from others you might have tried is the commitment to building layers of flavor from scratch in a way that is still incredibly efficient. We are not just tossing chicken with bottled dressing and calling it a day. We are making a quick, punchy homemade Caesar dressing that comes together in under three minutes with ingredients you likely already have. The anchovy paste provides that essential umami backbone, the fresh lemon juice brightens everything, and the Dijon mustard helps emulsify the dressing into something truly creamy. The chicken is simply seasoned and pan-seared to golden perfection, sliced against the grain so each bite is tender. Every element, from the slightly crushed croutons to the final optional grill on the wrap, is a deliberate choice designed to create the best possible eating experience. If you have ever made fluffy Japanese souffle pancakes, you know that attention to small details transforms a simple dish into something extraordinary, and the same principle applies here.
This recipe is perfect for anyone who needs a reliable, satisfying lunch that feels a little bit special. It is ideal for packed work lunches, though I recommend storing the components separately if you are prepping ahead. It shines at casual weekend gatherings when you want to serve something familiar but impressive, and it is a lifesaver on busy weeknights when cooking feels like a chore. The entire thing comes together in about thirty minutes. I have made this for friends during a quick catch-up lunch, and I have wrapped them individually in parchment paper for a picnic in the park. There is something about holding a neatly wrapped bundle filled with crisp lettuce, juicy chicken, and creamy dressing that just feels fun and a little nostalgic, like the best kind of grown-up lunchbox meal.
Why You Will Love This Classic Chicken Caesar Wrap Recipe
- Incredibly fast and efficient. From start to finish you are looking at about 30 minutes for a complete lunch that tastes like it came from a cafe. The dressing comes together while the chicken rests, so there is almost no idle time.
- Perfectly portable and mess-free. A properly rolled wrap with the dressing as a base layer keeps everything contained. This means you can eat it with one hand while working, driving, or chasing a toddler around the park without losing half the filling.
- Homemade dressing makes all the difference. Once you taste how simple and vibrant a fresh Caesar dressing can be, you will never want to go back to the bottled stuff. The anchovy paste melts into the mayonnaise base, creating a savory depth that does not taste fishy at all, just deeply flavorful.
- Completely customizable to your taste. You can swap the protein, add bacon, or use a different green like kale. The formula is flexible, so you can adapt it to whatever you have in your refrigerator without losing the essential character of the dish.
- That irresistible crunch factor. Slightly crushing the croutons before adding them to the filling means you get little bits of garlicky crunch in every single bite, not just one big jagged piece that threatens to tear the tortilla.
- A crowd-pleaser for all ages. My kids, who are suspicious of anything green, devour these wraps without hesitation. The familiar flavors and handheld format make it approachable, while adults appreciate the well-balanced, savory profile.
Your Simple Ingredients for the Perfect Classic Chicken Caesar Wrap
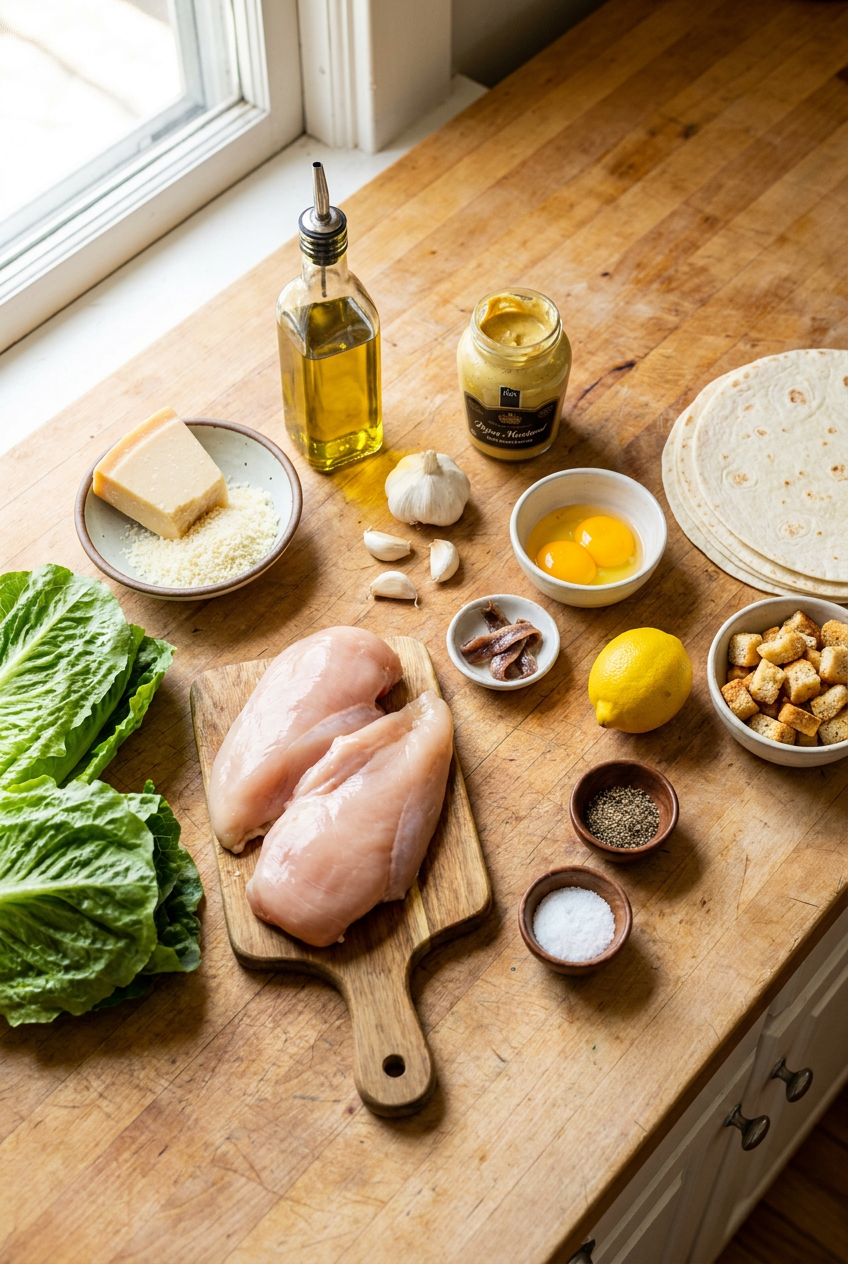
For the Chicken
- 2 (about 1 lb total) boneless, skinless chicken breasts, pounded to even thickness
- 1 tbsp olive oil
- 1 tsp garlic powder
- 1/2 tsp salt
- 1/4 tsp black pepper
For the Caesar Dressing (yields about 3/4 cup)
- 1/2 cup mayonnaise, full-fat preferred
- 1/4 cup freshly grated Parmesan cheese
- 2 tsp anchovy paste, or 3 minced anchovy fillets
- 2 tbsp lemon juice, freshly squeezed
- 1 tsp Dijon mustard
- 1 clove garlic, minced
- 2 tbsp cold water, to thin
- 1/4 tsp salt, to taste
Wrap Assembly
- 4 (10-inch) burrito-size flour tortillas, plain or whole wheat
- 4 cups chopped romaine lettuce, hearts are best, cut into 1/2-inch strips
- 1/4 cup shaved Parmesan cheese, plus extra for garnish
- 1/2 cup Caesar croutons, slightly crushed
- 1/2 tsp freshly ground black pepper
Ingredient Notes
Chicken breasts. Boneless skinless breasts are the lean and classic choice here. Pounding them to an even half-inch thickness is the single most important step for juicy results, as it ensures the entire piece cooks at the same rate. Look for breasts that are similar in size. If you only have chicken thighs available, they work beautifully, just pound them slightly and cook a minute or two longer per side. Their higher fat content makes them very forgiving.
Mayonnaise. Full-fat mayonnaise provides the richest, most stable base for the dressing. It creates a luscious texture that clings to every ribbon of romaine. If you prefer a lighter option, you can use a light mayonnaise, but avoid fat-free versions which tend to be watery and sweet. The texture will be slightly thinner, so you may want to reduce the water added.
Anchovy paste. This is the secret weapon in any authentic Caesar dressing. It provides a salty, savory depth that defines the flavor profile without tasting overtly fishy. Anchovy paste in a tube is convenient and stores in the refrigerator for months. If you cannot find it, three minced anchovy fillets from a tin work just as well. In a pinch, a teaspoon of Worcestershire sauce can stand in, though the result will be slightly less complex.
Lemon juice. Freshly squeezed lemon juice is non-negotiable here. The bright acidity cuts through the richness of the mayonnaise and chicken, balancing the entire wrap. Bottled lemon juice has a flat, slightly metallic taste that will dull the vibrancy of the dressing. One medium lemon typically yields about two tablespoons.
Romaine lettuce. Hearts of romaine are ideal because they are crunchier and have a higher ratio of pale, crisp inner leaves. Chop them into half-inch strips so they integrate seamlessly with the other ingredients. Make sure the lettuce is completely dry after washing, or the dressing will slide right off and you will end up with a soggy wrap.
Croutons. Caesar croutons are typically flavored with garlic and herbs. Slightly crushing them before adding to the filling is a small step that makes a big difference, breaking them into smaller, manageable pieces that distribute evenly. For the best flavor and crunch, consider making your own from day-old sourdough bread tossed with olive oil, garlic powder, and a pinch of salt, then baked until golden.
How to Make Perfect Classic Chicken Caesar Wrap
Phase 1: Prepare the Chicken
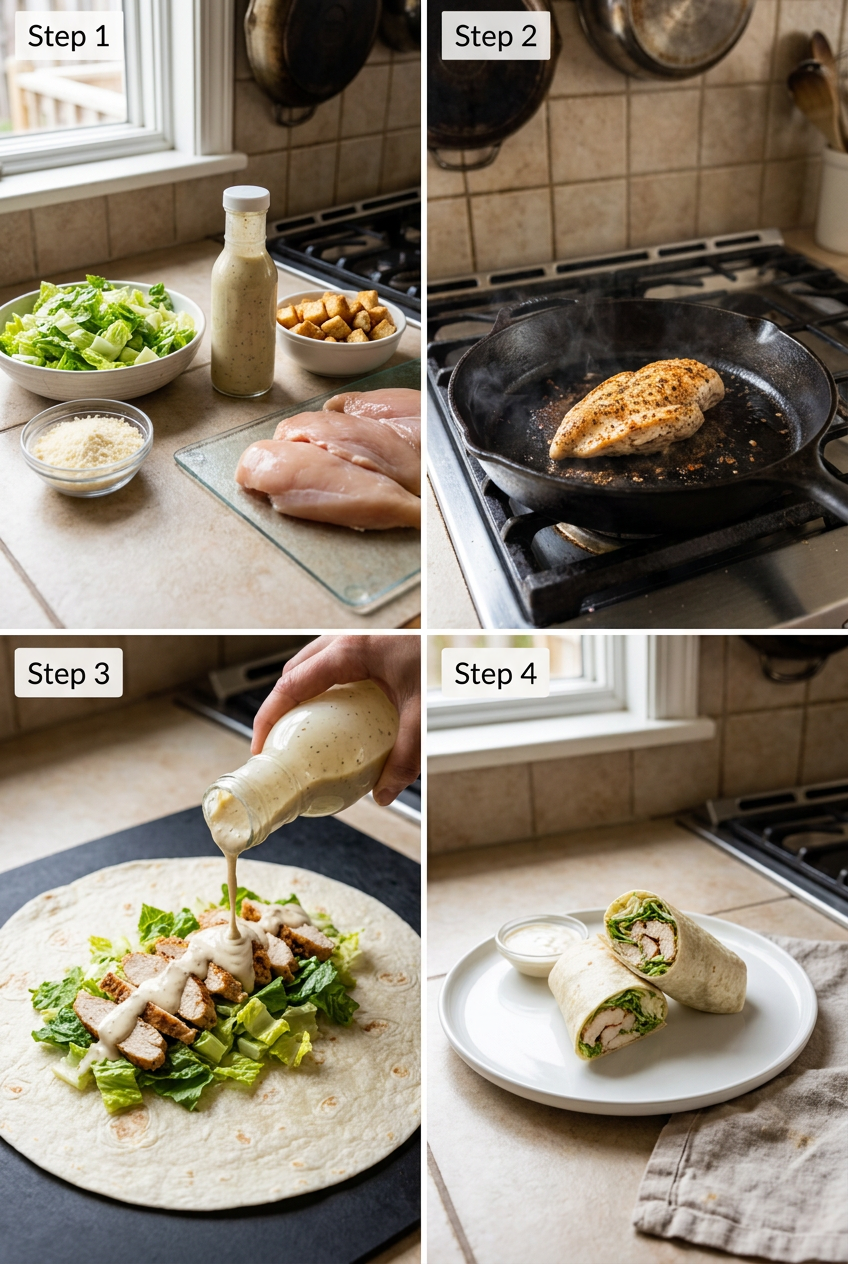
Start by placing your chicken breasts between two sheets of plastic wrap or inside a resealable bag. Using a meat mallet or the flat bottom of a heavy skillet, pound them to an even half-inch thickness. This is the secret to juicy results, as it eliminates the tapered thin end that would otherwise dry out before the thicker part cooks through. Pat the chicken completely dry with paper towels. Any surface moisture will steam the meat instead of searing it. Drizzle the olive oil over both breasts and rub it in, then season both sides generously with the garlic powder, salt, and pepper. Heat a large skillet or grill pan over medium-high heat. When you can hold your hand a few inches above the surface and feel a strong, steady heat, the pan is ready. Lay the chicken in the pan away from you to avoid splatter. Let it cook undisturbed for 6 to 7 minutes. You will know it is time to flip when the chicken releases easily from the pan and the bottom is a deep golden brown. Flip and cook for another 6 to 7 minutes. The internal temperature should reach 165 degrees Fahrenheit. Transfer the chicken to a cutting board and let it rest for a full 5 minutes. This rest period allows the juices to redistribute, so they stay in the meat when you slice. Slice the chicken thinly against the grain, which shortens the muscle fibers and makes each piece more tender to bite. If you are looking for another dish that relies on perfectly cooked poultry, you might enjoy the tender, slow-braised results in a Moroccan chicken tagine.
Phase 2: Make the Caesar Dressing
While the chicken rests, make the dressing. In a medium bowl, combine the mayonnaise, freshly grated Parmesan cheese, anchovy paste, freshly squeezed lemon juice, Dijon mustard, and minced garlic. Add a small pinch of salt. Whisk everything together until it is completely smooth and uniform. At this stage, the mixture will be quite thick. Stream in the cold water, one tablespoon at a time, whisking constantly. The dressing will loosen and become silky and pourable. It should coat the back of a spoon and hold a line drawn through it with your finger. Taste it on a piece of romaine, because the salt from the Parmesan and anchovy varies. Adjust with more lemon for brightness or a tiny bit more salt if needed. Set the dressing aside until you are ready to assemble.
Phase 3: Warm the Tortillas and Toss the Filling
Wipe out the skillet you used for the chicken and return it to medium heat. Warm each flour tortilla for 20 to 30 seconds per side. You are looking for it to become soft and pliable, with a few light brown blisters. A warm tortilla is flexible and much less likely to crack when you roll it. Stack the warmed tortillas on a plate and cover them with a clean kitchen towel to trap the heat. In a large mixing bowl, combine the chopped romaine, half of the shaved Parmesan, and the crushed croutons. Pour a quarter cup of the dressing over the top and toss well with your hands or tongs until every piece of lettuce is thinly coated. The lettuce should glisten but not drip. Add a little more dressing only if it looks dry.
Phase 4: Assemble and Finish the Wraps
Lay one warm tortilla on a clean, flat surface. Spread about one tablespoon of the remaining dressing in a horizontal line across the center of the tortilla. Think of this as edible glue, it anchors the filling and adds an extra creamy bite right in the middle. Pile a quarter of the dressed romaine mixture on top of the dressing line. Arrange a quarter of the sliced chicken over the lettuce, and finish with a sprinkle of the remaining shaved Parmesan and a crack of black pepper. To roll, fold the left and right sides of the tortilla inward over the filling, leaving about a two-inch border on each end. Then, starting from the edge closest to you, roll the tortilla tightly away from you, using your fingers to tuck the filling in as you go. The seam should end up on the bottom. For a crispy, golden exterior, place the rolled wrap seam-side down back in the warm skillet over medium heat. Cook for one to two minutes per side, pressing gently with a spatula, until the tortilla is toasted and the seam is sealed. Slice each wrap in half on a sharp diagonal using a serrated knife, which cuts through the tortilla cleanly without crushing the wrap.
Pro Tips and Easy Variations for Your Classic Chicken Caesar Wrap
Pro Tips
- Brine the chicken for peak juiciness. If you have an extra fifteen minutes, dissolve a tablespoon of salt in two cups of cold water and submerge the chicken breasts. This simple brine seasons the meat from the inside and helps it retain moisture during cooking. Pat the chicken completely dry before proceeding with the oil and seasoning.
- Use freshly grated Parmesan only. Pre-shredded or powdered Parmesan contains anti-caking agents that prevent it from melting smoothly into the dressing. Grating a wedge yourself on a microplane or the small holes of a box grater takes an extra minute but results in a dressing that is velvety and deeply savory, not gritty.
- Crush croutons inside their bag. Before opening the package of croutons, give it a few firm rolls with a rolling pin or the heel of your hand. This contains the mess and gives you perfectly broken, bite-sized pieces that meld into the filling without poking through the tortilla.
- Roll the wrap in parchment paper. After assembling, wrap the finished wrap tightly in a sheet of parchment paper before cutting. This holds everything in a neat cylinder and makes for a beautiful presentation, similar to how your favorite deli packages their wraps. Simply peel back the paper as you eat.
- Let the dressing rest for a few minutes. After whisking, letting the dressing sit for five to ten minutes allows the garlic and anchovy flavors to bloom and meld together. The taste will be more cohesive and rounded, with no single ingredient standing out too sharply.
Delicious Variations
- Grilled Shrimp Caesar Wrap. Replace the chicken with eight large shrimp per wrap, peeled and deveined. Season with smoked paprika, lemon zest, salt, and a drizzle of olive oil before grilling for two to three minutes per side until pink and curled. The seafood adds a lighter, summery feel.
- Bacon and Avocado Caesar Wrap. Cook two slices of thick-cut bacon per wrap until crispy, then crumble them over the filling. Add a quarter of a sliced avocado, fanned out on top of the chicken. The smoky bacon and creamy avocado take the richness to a whole new level. If you enjoy that combination of creamy and savory, you might also love the flavors in blueberry lemon ricotta pancakes for a sweet weekend brunch.
- Kale Caesar Wrap. For a heartier, more nutrient-dense version, swap the romaine for lacinato kale. Remove the tough stems and slice the leaves into thin ribbons. Massage the kale with a teaspoon of olive oil and a pinch of salt for a minute until it darkens and softens, then toss with the dressing. The sturdy kale holds up beautifully, even if the wrap sits for a while.
- Spicy Chicken Caesar Wrap. Add a teaspoon of hot sauce or a pinch of cayenne pepper to the dressing. You can also coat the chicken with a half teaspoon of chili powder along with the other seasonings before searing. A drizzle of sriracha mayo on the tortilla adds a final punch of heat.
Serving Suggestions for a Perfect Lunch
These wraps are a complete meal on their own, but a few well-chosen sides can turn lunch into a spread that feels thoughtfully composed. A cup of roasted tomato soup is a classic pairing, the tangy warmth of the soup dipping perfectly with the cool, creamy wrap. If you are craving a salty, crunchy contrast, a dill pickle spear or a handful of kettle-cooked potato chips on the side are simple and satisfying. For something more substantial, sweet potato wedges roasted with olive oil and smoked paprika bring a touch of natural sweetness and vibrant color to the plate. As for drinks, an icy cold glass of lemonade or sparkling water with a slice of lemon echoes the citrus notes in the dressing beautifully.
This recipe was designed for casual lunches, whether you are packing a brown bag for the office or setting out a platter for a relaxed weekend gathering. If you are feeding a crowd, the components scale beautifully. Grill the chicken ahead of time, make a double batch of dressing, and set up a wrap assembly station. Let everyone build their own, which is especially fun for kids who love to customize their fillings. For a picnic or road trip, wrap each finished roll tightly in parchment paper and secure it with twine. The wraps stay contained and are easy to eat without plates, making them ideal for outdoor summer concerts or a quick stop at a scenic overlook.
Nutrition Information
(Approximate per serving, 4 servings total) Calories: 420, Fat: 22g, Carbohydrates: 28g, Protein: 34g, Fiber: 3g, Sugar: 3g, Sodium: 620mg. Nutritional values are estimates only.
Storage and Make-Ahead Instructions
- Refrigerator: Store assembled wraps tightly wrapped in plastic wrap or parchment paper for up to 3 days, though they are best within 24 hours. Over time, the dressing will soften the tortilla and the lettuce will lose some of its crispness. The flavor remains delicious, but the texture is at its peak shortly after assembly.
- Freezer: Freezing is not recommended. The high water content in romaine lettuce causes it to become mushy and unappetizing upon thawing. The dressing can also separate, creating a watery texture.
- Reheating: For the best experience with a leftover wrap, carefully open it and remove the chicken slices. Reheat the chicken separately in a dry skillet over medium heat for about one minute per side, or in the microwave for 30 to 45 seconds. Reassemble the wrap with the refreshed lettuce and dressing. This method brings back the warm chicken element without wilting the greens.
- Make-Ahead: You can prep almost every component in advance. Cook and slice the chicken up to two days ahead and store it in an airtight container in the refrigerator. Make the dressing up to three days ahead, it actually gets better as the flavors meld. Wash, chop, and thoroughly dry the romaine, then store it wrapped in paper towels inside a sealed bag. When you are ready to eat, simply warm the tortillas, toss the filling, and assemble. This makes lunch come together in under ten minutes.
Your Classic Chicken Caesar Wrap Questions Answered
Can I make this classic chicken caesar wrap recipe ahead of time for a packed lunch?
Yes, with a small adjustment. For the best texture, pack the dressed romaine mixture, sliced chicken, and tortilla separately. Assemble the wrap right before eating. If you must assemble completely ahead of time, place a layer of whole romaine leaves between the tortilla and the dressed filling to act as a moisture barrier, which helps keep the tortilla from becoming soggy for a few hours.
What is the best substitute for anchovy paste?
The closest substitute is three minced anchovy fillets from a tin. If you do not have those, one teaspoon of Worcestershire sauce adds a similar fermented, umami quality. The flavor profile will shift slightly, becoming less briny and a bit sweeter, but it still provides the savory depth you need. For a vegetarian version, a teaspoon of miso paste or a small amount of finely chopped capers can approximate the salty richness.
How do I prevent my wrap from getting soggy?
Soggy wraps are almost always caused by excess moisture. Make sure your romaine is completely dry after washing, a salad spinner is your best tool here. When assembling, spread a thin layer of dressing directly on the tortilla as a base, which creates a barrier. Do not overdress the lettuce mixture, it should be lightly coated, not drenched. Finally, eating the wrap soon after assembly is the surest way to maintain that ideal contrast of textures.
Can I use a different type of tortilla?
Absolutely. While burrito-size flour tortillas are ideal because they are sturdy and flexible, you can use whole wheat, spinach, or sun-dried tomato flavored tortillas for extra color and taste. Gluten-free tortillas also work, but they tend to be more brittle, so warming them until they are very pliable is especially important. Avoid smaller taco-size tortillas, as they will not hold all the filling.
How do I know when the chicken is cooked perfectly?
The most reliable method is using an instant-read thermometer inserted into the thickest part of the breast. It should read 165 degrees Fahrenheit. Visually, the chicken will be opaque throughout with clear juices and no pinkness at the center. The surface should be a deep golden brown from a proper sear. Letting it rest after cooking is crucial, as the internal temperature will rise a few degrees and the juices will settle.
My dressing tastes too sharp, how can I fix it?
If your dressing is overly tangy, the balance of lemon juice and mayonnaise might be off. Whisk in an extra tablespoon of mayonnaise, a small amount at a time, which will mellow the acidity and add creamy body. If it still tastes sharp, a tiny pinch of sugar can help round out the flavors without making it taste sweet. Always taste and adjust incrementally.
Can I grill the chicken outdoors instead of using a skillet?
Yes, grilling adds a wonderful smoky flavor. Preheat your grill to medium-high heat and oil the grates. Grill the pounded chicken breasts for about five to six minutes per side, depending on thickness, until the internal temperature reaches 165 degrees Fahrenheit. Let them rest before slicing against the grain, just as you would with the skillet method.
What can I use instead of croutons for a gluten-free version?
Crushed gluten-free croutons work perfectly if you can find them. Alternatively, toasted nuts like slivered almonds or chopped pecans provide a similar crunch and savory note. Roasted chickpeas seasoned with garlic powder and salt are another excellent option, offering crunch and extra protein. Simply make sure whatever you use is in small pieces so it integrates into the filling.
Is it safe to use raw egg in the dressing?
Traditional Caesar dressing often uses a raw or coddled egg yolk for richness. This recipe uses mayonnaise instead, which is made with pasteurized eggs and is completely safe. If you prefer to make the dressing without mayonnaise, use a pasteurized egg yolk, which has been heat-treated to eliminate the risk of salmonella. Standard food safety guidelines recommend cooking eggs until both the white and yolk are firm.
More Incredible American Recipes to Try
If the combination of savory chicken and creamy, tangy dressing in this wrap speaks to you, there are so many other directions to explore in the world of American comfort food. You might love diving into the world of diner-style sandwiches, think a classic club sandwich with layers of turkey, bacon, and crisp lettuce on toasted bread, or a perfectly juicy burger with a homemade special sauce. These recipes share the same commitment to high-quality, simple ingredients and that deeply satisfying balance of textures and flavors. The joy of a well-built sandwich or a hearty, soul-warming stew is universal and endlessly adaptable to what you have on hand.
For those mornings when you want to channel that same care and attention into breakfast, tender plates of fluffy Japanese souffle pancakes offer a cloud-like start to the day. If you are drawn to dishes with complex, layered spice profiles and fall-apart-tender meat, the aromatic world of a slow-cooked Moroccan chicken tagine is a natural next step from the simplicity of a chicken wrap. And for a brunch that feels special yet comes together with ease, a stack of blueberry lemon ricotta pancakes delivers bursts of bright fruit flavor in every pillowy bite.
The Story Behind This Classic Chicken Caesar Wrap
The Caesar salad itself has a storied history, originating not in Italy as many assume, but in Tijuana, Mexico, in the 1920s. An Italian immigrant named Caesar Cardini is said to have created it on a busy Fourth of July weekend when kitchen supplies were running low. He assembled what he had: romaine lettuce, Parmesan cheese, olive oil, raw egg, Worcestershire sauce, and garlic, and famously tossed it tableside with dramatic flair. It was an instant sensation. The salad traveled north to the United States, where it became a staple on restaurant menus, evolving to include grilled chicken as a protein and croutons for crunch.
The wrap version is a much more recent, decidedly American innovation. As our lives got busier and our eating habits more casual, the need for portability met the desire for something more sophisticated than a basic sandwich. Wrapping the iconic salad in a tortilla was a natural evolution that took hold in delis and fast-casual restaurants across the country in the 1990s and early 2000s. This recipe brings that concept full circle, taking the convenience of the wrap and pairing it with the from-scratch care of the original salad preparation. It is a reminder that even the humblest weekday lunch can carry a little bit of culinary legacy in every bite.
Pin This Classic Chicken Caesar Wrap Recipe for Later
Love this recipe? Save it to your favorite Pinterest board so you can find it again easily. Share it with friends and family who would enjoy making it too.
I truly hope this recipe brings a moment of delicious ease to your week. When you make it, I would love to hear how it turned out. Leave a comment below and tell me whether you went with the classic version or tried one of the variations. Maybe you discovered a new trick or added your own favorite ingredient, I am always looking for new ideas and your kitchen is the best inspiration there is.
Classic Chicken Caesar Wrap
Ingredients
Method
- Pat chicken dry, coat with olive oil, and season both sides with garlic powder, salt, and pepper. Heat a large skillet or grill pan over medium-high heat. Cook chicken for 6–7 minutes per side until golden brown and internal temp reaches 165°F. Transfer to a cutting board, rest 5 minutes, then slice thinly against the grain.
- In a medium bowl, whisk together mayonnaise, grated Parmesan, anchovy paste, lemon juice, Dijon, minced garlic, and a pinch of salt. Stream in cold water while whisking until smooth and pourable. Taste and adjust salt, lemon, or anchovy as desired. Set aside.
- In a large bowl, combine chopped romaine, half the shaved Parmesan, crushed croutons, and ¼ cup of the dressing. Toss well to coat evenly. Add more dressing if needed—it should be creamy but not soggy.
- Wipe the skillet clean and warm each tortilla over medium heat for 20–30 seconds per side until pliable and lightly blistered. Stack them on a plate and cover with a clean towel to keep warm.
- Place a warm tortilla on a flat surface. Spread 1 tablespoon of dressing in a horizontal line down the center (this acts as glue). Pile ¼ of the dressed romaine mixture, top with a quarter of the sliced chicken, and sprinkle with remaining shaved Parmesan. Fold in the sides, then roll tightly from the bottom up, pressing gently.
- For a crispy finish, return the rolled wraps to the skillet, seam-side down, over medium heat. Cook for 1–2 minutes per side until golden and the seam is sealed. Use a sharp serrated knife to cut each wrap in half diagonally. Serve immediately with extra dressing.
Disclosure: This post may contain affiliate links. If you purchase through our links we may earn a small commission at no extra cost to you.
If you made this Classic Chicken Caesar Wrap, please leave a comment below and let me know how it turned out.